
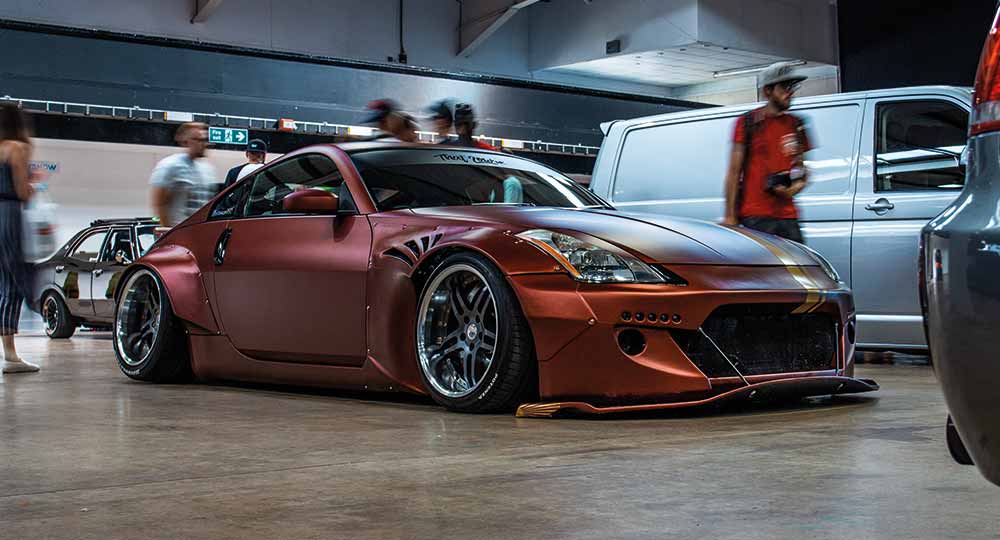
Modified Car Insurance
Been turned down for motor insurance because you’ve modified your car? If so, give us a call for a quote. We’re a specialist modified car insurance broker that takes pride in insuring the “uninsurable”. Choose an agreed value policy with us to protect your pride and joy.
Why choose Adrian Flux?
- No more frustrating conversations with insurers who don’t know about mods
- We view modders positively, aware you’ll probably take more care of your car
- Specialised in modified cars since Adrian Flux was founded in 1973
- Getting a quote takes under 10 minutes
- Optional extras available so you can get a tailored policy
- Great discounts for limited mileage policies, car club members, and more


What is a modified car?
The definition of a car modification is any change that’s been made to a vehicle so it differs from the manufacturer’s original factory specification.
Modifications aren’t all bad, though. In some cases, they could lower your premiums. This is often the case when you fit a dashcam, a towbar, or parking sensors. Let us know how you’ve altered your car (or even if you’re simply planning on altering it) and we’ll use our comparison system to find out how this will affect your modified car insurance premiums if at all.

Is it hard to insure a modified car?
Insuring a modified car isn’t actually as difficult as you might think. While more general car insurance companies don’t always understand the true value of some modifications, as specialists, we enjoy finding unusual modified cars in need of specialist modified car insurance.
Simply give us a call. And if our lines aren’t currently open, fill in our online quote form and we’ll get back to you with a great deal.


Extra Benefits
-
Agreed Value
-
Breakdown
-
Keycare
-
Track Days

Agreed value policies available
If you’ve modified your car, chances are you’ve spent money and time on making it the vehicle you want. We offer agreed value policies to cover the car and its modifications. This ensures that even if you have to rebuild the car from scratch, you don’t get paid for less than the true value of the vehicle.
Is modified car insurance cheaper?
Yes, when compared to non-modified cars that offer like-for-like performance, modified car insurance can be cheaper. There are a number of discounts available to modified car owners, including for limited mileage cover, modifications you’ve done yourself, and for owners club members. Compared to similar non-modified performance vehicles, most custom cars are also treated as classics so premiums reflect this.

How do I reduce insurance costs as a modded car owner?
There are many ways you can reduce the cost of your modified car insurance policy even if you have an expensive modified car.
The following tips could help you. Make sure to let us know if any of these apply to you!


Cover for young drivers
Insurance is already expensive for young drivers, but pair this with a modified car and you’ll be paying through the roof. Thankfully, we view you a little differently. We understand that passion for cars begins early, which is why we insure people that other insurance brokers deem “uninsurable”.
Cover for adapted vehicles and WAVs
And if you’re a disabled driver? We also cover you if you have a disability and need to modify your car so it’s more usable. Disabled adaptions can be covered on a new for old policy – ask us about new for old cover on disability adaptions. We also offer cover for wheelchair accessible vehicles (WAVs).
Should I tell my insurance provider my car is modified?
Yes, modifications can void your insurance policy if not declared, which is why we offer dedicated insurance specifically for modified cars. Even if you don’t think a modification matters, it’s best to let us know when you’ve made a change to your vehicle. This way, we can alter your policy in line with your needs and make sure anything disclosed is covered.


Can I get modified classic car insurance?
Whether you’ve restored your classic to its former glory or you’ve modified your vintage car, we can cover it. We offer modified classic car insurance to petrolheads who have gone a step further to make their classic vehicle their own.


